
A chain link fence is a durable and cost-effective option for residential and commercial properties‚ offering security and versatility. Proper installation ensures longevity and aesthetic appeal‚ making it a popular choice for various fencing needs.
1.1. Overview of Chain Link Fences
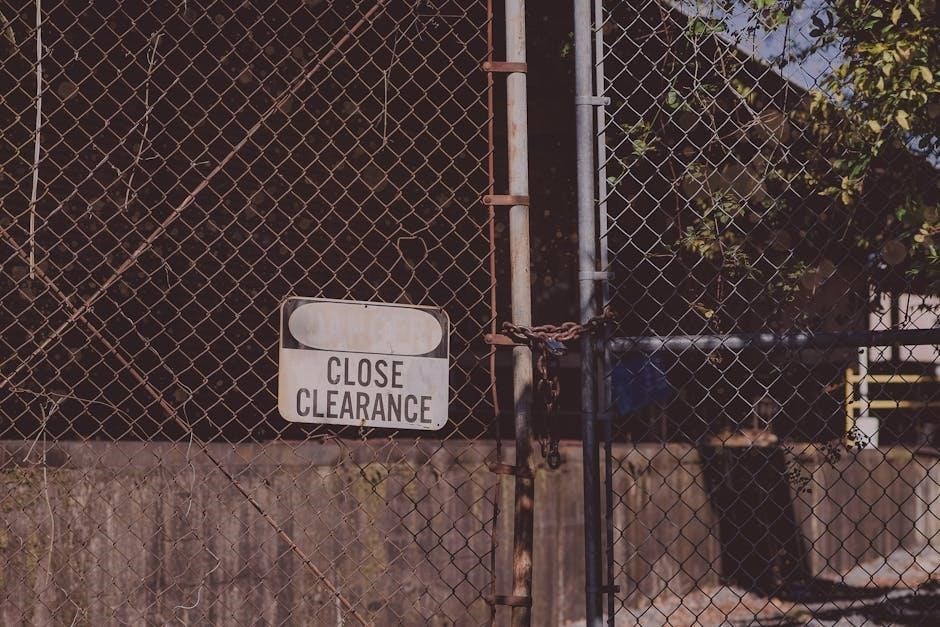
A chain link fence is a popular‚ versatile fencing option known for its durability and affordability. It consists of metal posts‚ rails‚ and interlocking wire fabric‚ creating a sturdy yet flexible barrier. Ideal for residential‚ commercial‚ or industrial use‚ chain link fences provide security‚ mark boundaries‚ and can be customized in height and design. They are often chosen for their low maintenance and ability to withstand various weather conditions‚ making them a practical solution for diverse fencing needs.
1.2. Importance of Proper Installation
Proper installation is crucial for a chain link fence to ensure stability‚ longevity‚ and safety. Incorrect techniques can lead to structural weaknesses‚ sagging‚ or uneven alignment‚ compromising the fence’s effectiveness. Securely setting posts‚ tightening wires‚ and using appropriate hardware are essential steps to prevent future repairs and maintain the fence’s appearance and functionality. A well-installed fence not only enhances property value but also provides long-term security and durability‚ making it a worthwhile investment for homeowners and businesses alike.
1.3. Purpose of the Guide
This guide provides a comprehensive‚ step-by-step approach to installing a chain link fence‚ ensuring even DIY enthusiasts can achieve professional results. It covers essential steps‚ from planning and preparation to final touches‚ offering practical advice and tips. The guide aims to eliminate guesswork‚ helping readers avoid common mistakes and ensure a secure‚ durable‚ and visually appealing fence. By following these instructions‚ homeowners and contractors can confidently complete their fencing projects efficiently and effectively.
Planning and Preparation
Planning involves obtaining permits‚ surveying property lines‚ and measuring the fence layout to ensure compliance with regulations and proper fit. This step is crucial for success.
2.1. Obtaining Necessary Permits
Before starting your chain link fence installation‚ ensure you obtain all required permits. Check local zoning laws and building codes to determine if a permit is needed. Some areas may have specific regulations regarding fence height‚ material‚ or placement; Additionally‚ verify property lines to avoid disputes with neighbors. Securing permits early avoids project delays and potential fines. This step ensures compliance with local ordinances and guarantees a smooth installation process.
2.2. Surveying Property Lines
Surveying your property lines is crucial to ensure your fence is installed correctly within your boundaries. Hire a professional surveyor or use existing property maps to identify exact boundaries. Mark the corners of your property with stakes or flags to guide your fence layout. This step prevents encroachment on neighboring land and ensures compliance with local regulations. Accurate surveying is essential for a successful and stress-free installation process.
2.3. Measuring the Fence Layout
Measuring the fence layout accurately ensures proper fit and alignment. Begin by determining the total perimeter of the area to be fenced. Use a tape measure to mark the locations of posts‚ gates‚ and corners. Ensure measurements account for any obstacles or slopes. Record all dimensions to create a precise plan. Accurate measurements prevent costly mistakes and ensure all materials fit seamlessly during installation. This step is foundational for a successful chain link fence project;
Materials and Tools Needed
Essential materials include chain link fabric‚ posts‚ rails‚ wire ties‚ and concrete. Tools needed are post hole diggers‚ wire cutters‚ measuring tape‚ and levels.
3.1. List of Required Materials
The essential materials for a chain link fence include chain link fabric‚ terminal posts‚ line posts‚ top and bottom rails‚ wire ties‚ and concrete for post setting. Additional items like tension bars‚ loop caps‚ and post caps are also necessary. For security‚ barbed wire or razor wire can be added. Optional features include privacy slats or decorative caps for enhanced appearance. Ensure all materials meet local building codes and standards for durability and safety.
3.2. Tools for Installation
The tools needed for chain link fence installation include a post hole digger or power auger for digging holes‚ a shovel for mixing concrete‚ and a wire cutter for trimming fabric. A tension bar and come-along are essential for tightening the wire. Additional tools like measuring tape‚ level‚ and hammer are also required. Safety gear such as gloves and safety glasses should be worn. Graph paper and stakes may be used for precise layout planning.
3.3. Safety Equipment
Proper safety equipment is crucial for chain link fence installation. Wear gloves to protect hands from cuts and abrasions‚ and safety glasses to prevent eye injuries from flying debris. A first aid kit should always be on hand. Use a hard hat when working near overhead obstacles or with heavy materials. Steel-toe boots are recommended for protection from heavy tools or falling objects. Ensure loose clothing is tied back‚ and avoid jewelry that could get caught in tools or wire. Proper safety gear prevents accidents and ensures a smooth installation process.

Setting Up the Posts
Setting up posts is a critical step in chain link fence installation; Mark locations‚ dig holes‚ and secure posts with concrete to ensure stability and proper alignment.
4.1. Marking Post Locations
Begin by marking the exact spots for corner‚ gate‚ and end posts using stakes and spray paint. Measure the fence layout to ensure accurate spacing and alignment. Check property lines to avoid encroachment. Use graph paper to map out the posts’ positions‚ ensuring proper distance between them. Verify the measurements to maintain consistency and prevent errors during installation. This step is crucial for a straight and well-aligned fence structure.
4.2. Digging Post Holes
Use a post hole digger or power auger to create holes for each marked post location. Dig holes 12 inches deep and slightly wider than the posts. Ensure holes are level and aligned with the fence layout. For stability‚ extend holes 4 inches deeper for concrete footings. Space holes evenly‚ maintaining the planned distance between posts. Proper digging is essential for secure post placement and a sturdy fence foundation.
4.3. Setting Corner and Gate Posts
Begin by marking the exact locations for corner and gate posts using stakes and string. Dig holes slightly deeper for these posts to ensure stability. Place the posts in the holes‚ ensuring they are level and aligned with the fence layout. Fill the holes with concrete‚ tamping it down to eliminate air pockets. Allow the concrete to set fully before proceeding with the next steps. Properly set corner and gate posts are crucial for the structural integrity and alignment of the entire fence.
4.4. Pouring Concrete for Posts
Once the post holes are dug‚ mix concrete according to the manufacturer’s instructions. Pour the concrete into the holes‚ ensuring it fills to about 2-3 inches above ground level. Use a level tool to ensure the posts remain straight and plumb. Tamp the concrete gently to eliminate air pockets. Allow the concrete to cure completely‚ following the recommended setting time‚ before attaching rails or panels. Properly cured concrete ensures the posts are secure and stable for the fence structure.
Attaching Rails and Panels
Attach top and bottom rails to the posts using rail brackets. Secure the chain link fabric to the rails with wire ties‚ ensuring tightness and alignment for stability.
5.1. Installing Top and Bottom Rails
Begin by attaching rail brackets to the posts‚ ensuring they are evenly spaced. Insert the top and bottom rails into the brackets‚ aligning them carefully. Secure the rails with bolts‚ tightening firmly to maintain stability. Check the alignment and spacing between rails for consistency. Once the rails are in place‚ weave the chain link fabric through them‚ attaching it with wire ties. Tighten the fabric to avoid sagging and ensure a smooth‚ even surface. Follow safety guidelines and double-check all hardware for security.
5.2. Attaching Chain Link Fabric
Unroll the chain link fabric and align it with the top and bottom rails. Secure the fabric to the posts using wire ties‚ starting at one corner and working your way along the fence. Tighten the fabric as you go to ensure it remains taut and evenly spaced. Use wire ties every 12 inches to maintain stability. Once the fabric is attached‚ check for any sagging or loose areas and tighten as needed. Trim excess fabric at the end posts to complete the installation.
5.3. Securing with Wire Ties
After attaching the chain link fabric‚ secure it to the top and bottom rails using wire ties. Insert the wire ties through the fabric and rail‚ then twist them tightly to hold the fabric in place. Space the wire ties evenly‚ typically every 12 inches‚ to ensure the fabric remains taut. Use a tool to tighten the ties firmly‚ preventing any sagging or looseness. This step is crucial for maintaining the fence’s stability and appearance over time. Properly securing the fabric ensures long-lasting durability and security.
5.4. Tightening the Wire
After securing the chain link fabric with wire ties‚ tighten the wire to eliminate any slack. Start at one corner post and work your way along the fence‚ using a tool like a come-along or wire tightener. Pull the wire taut‚ ensuring even tension across the entire span. Tightening the wire properly prevents sagging and ensures the fence remains secure and visually appealing. Once tightened‚ trim any excess wire at the end posts for a clean finish. Proper tension is essential for the fence’s durability and stability.
Installing Gates
Gate installation involves measuring the opening‚ assembling the frame‚ and attaching hinges and hardware. Ensure proper alignment and secure the gate to maintain functionality and security.
6.1. Measuring Gate Opening
Accurately measure the gate opening to ensure proper fit and functionality. Use a tape measure to determine the width between the gate posts. Consider the space needed for hinges and latches. Standard gate heights typically match the fence‚ but custom sizes may be required. Double-check measurements to avoid errors during assembly. This step is crucial for ensuring the gate operates smoothly and aligns with the fence structure. Precise measurements prevent costly adjustments later.
6.2. Assembling the Gate Frame
6.3. Attaching Hinges
Mark the hinge locations on the gate post and frame‚ ensuring proper alignment. Drill pilot holes and screw the hinges to the gate frame. Secure the other side of the hinges to the post using bolts or screws. Tighten firmly to ensure stability. Double-check alignment and adjust if necessary. This step ensures the gate swings smoothly and remains securely attached to the fence. Properly installed hinges are essential for the gate’s functionality and longevity.
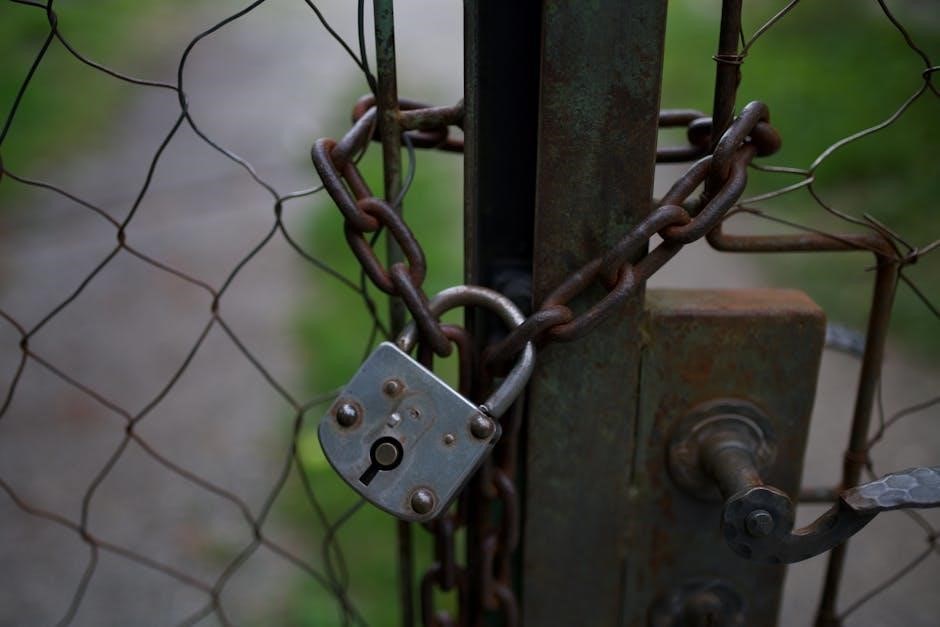
6.4. Installing Latch or Lock
Position the latch or lock on the gate frame‚ aligning it with the post. Screw the latch mechanism into place‚ ensuring secure fastening. Attach the lock‚ if using‚ according to manufacturer instructions. Tighten all screws or bolts firmly. Test the latch or lock to ensure smooth operation and proper alignment. This step ensures the gate is securely closed and accessible when needed. Proper installation of the latch or lock is crucial for the fence’s functionality and security.
Finishing Touches
Install post caps to protect posts from weather and enhance appearance. Trim excess wire and tighten any loose connections. Add optional decorative elements like vinyl coating or color accents. Ensure all hardware is secure and the fence is visually appealing. This step finalizes the installation‚ providing a polished and durable finish to your chain link fence. A thorough inspection ensures everything is properly aligned and secure.
7.1. Tightening the Chain Link Wire
Tightening the chain link wire ensures stability and security. After installing the fabric‚ use a wire tightener or come-along tool to pull the wire taut. Start at one corner post and work along the fence line‚ ensuring even tension. Be cautious not to over-tighten‚ as this can damage the wire or posts. Proper tension prevents sagging and enhances the fence’s durability. This step is crucial for both functionality and visual appeal of the chain link fence. Regular checks are recommended to maintain optimal tension over time.
7.2. Trimming Excess Wire
After tightening the wire‚ inspect the fence for any excess material. Use bolt cutters or a hacksaw to trim overhanging wire‚ ensuring a clean finish; Be careful not to leave sharp edges‚ as they can pose safety risks. Trimming excess wire enhances the fence’s appearance and prevents loose ends from causing damage or injury. Always wear gloves during this process to protect your hands from sharp metal. Proper trimming ensures the fence looks neat and functions securely for years to come‚ maintaining its aesthetic and structural integrity.
7.3. Adding Post Caps
Post caps are installed to protect the tops of fence posts from weather damage and add a decorative touch. Choose from materials like plastic‚ metal‚ or wood. Simply place the cap over the post top and secure it with screws or adhesive. This step enhances both functionality and aesthetics‚ ensuring the posts remain durable while giving the fence a polished look. Post caps are optional but recommended for longevity and visual appeal. They come in various styles to match your fence design‚ making them a practical finishing touch. Adding post caps is a simple yet effective way to complete your fence installation‚ ensuring it looks professional and well-maintained. This small detail contributes significantly to the overall durability and appearance of the fence‚ making it a worthwhile addition to your project. By installing post caps‚ you not only protect your investment but also elevate the fence’s curb appeal‚ ensuring it stands the test of time. Proper installation of post caps is quick and easy‚ requiring minimal tools and effort. They are available in different designs‚ allowing you to customize the look of your fence while providing essential protection against the elements. Post caps are a subtle but important component of a well-installed chain link fence‚ offering both practical benefits and aesthetic value. Always ensure they are securely fastened to withstand weather conditions and maintain their appearance over time. This final touch not only protects your posts but also enhances the overall quality of your fence‚ making it a wise investment for any property. With a variety of options to choose from‚ you can select post caps that perfectly complement your fence style‚ ensuring a cohesive and attractive finish. Adding post caps is a simple yet impactful step in completing your chain link fence installation‚ providing lasting protection and visual appeal. Take the time to select and install post caps that meet your needs‚ as they play a crucial role in the longevity and appearance of your fence. By doing so‚ you ensure your chain link fence remains a durable and attractive feature of your property for years to come. Post caps are an essential detail that should not be overlooked‚ as they offer both functional and aesthetic benefits. Investing in high-quality post caps will pay off in the long run‚ protecting your fence posts and maintaining the overall integrity of your installation. Always consider the material and design of your post caps to ensure they align with your fence’s style‚ creating a seamless and professional finish. This attention to detail will make your fence stand out and provide lasting satisfaction. Adding post caps is a final step that brings your chain link fence installation to completion‚ ensuring it is both functional and visually appealing. By incorporating post caps into your project‚ you achieve a professional-looking fence that is both durable and attractive‚ making it a valuable addition to your property. Choose post caps that reflect your personal style and complement your fence design‚ ensuring a finish that is both practical and visually pleasing. This small but significant detail will enhance the overall quality of your fence‚ providing years of protection and aesthetic appeal. Always remember that post caps are a crucial part of a well-installed chain link fence‚ offering both protection and style. With the right selection and installation‚ they will ensure your fence remains a beautiful and functional feature of your property for years to come. By taking the time to add post caps‚ you complete your installation with a professional touch‚ ensuring your fence is both durable and visually appealing. This final step is essential for achieving a high-quality finish that reflects your investment in the fence. Always prioritize the installation of post caps to protect your posts and enhance the overall look of your chain link fence. With so many options available‚ you can easily find post caps that match your style and needs‚ ensuring your fence stands out as a well-crafted feature of your property. Adding post caps is a simple yet important step that brings your installation to a polished conclusion‚ providing lasting benefits for your fence’s appearance and durability. By incorporating post caps into your project‚ you ensure your chain link fence remains a attractive and secure feature of your property for years to come. This small detail makes a big difference in the overall quality and longevity of your fence‚ making it a worthwhile addition to your installation. Always consider post caps as a necessary component of your fence‚ as they offer both practical protection and aesthetic enhancement. With the right choice and proper installation‚ post caps will elevate your fence’s appearance while safeguarding it against the elements. This final touch is essential for achieving a professional and lasting result‚ ensuring your chain link fence remains a beautiful and functional part of your property. By adding post caps‚ you complete your installation with a detail that enhances both the durability and visual appeal of your fence‚ making it a wise and rewarding investment. Always remember that post caps are a vital part of a well-installed chain link fence‚ offering protection and style that contribute to the overall success of your project. With so many options to choose from‚ you can easily find the perfect post caps to complement your fence‚ ensuring a polished and professional finish. This simple step is crucial for achieving a high-quality result that reflects your dedication to your property’s improvement. By installing post caps‚ you ensure your fence is both secure and visually appealing‚ providing years of service and satisfaction. Always prioritize the addition of post caps to protect your investment and enhance the beauty of your chain link fence. With their practical benefits and aesthetic appeal‚ post caps are an essential detail that should not be overlooked. By taking the time to select and install the right post caps‚ you ensure your fence is both durable and attractive‚ making it a valuable addition to your property. This final step completes your installation with a professional touch‚ providing lasting protection and visual appeal. Always consider post caps as a necessary component of your fence‚ as they offer both functional and decorative benefits. With the right installation‚ they will ensure your chain link fence remains a beautiful and secure feature of your property for years to come. Adding post caps is a simple yet important step that enhances the overall quality of your installation‚ providing a polished finish that reflects your attention to detail. By incorporating post caps into your project‚ you achieve a professional-looking fence that is both durable and attractive‚ making it a worthwhile investment in your property’s appearance and security. This small but significant detail will ensure your fence stands the test of time‚ providing years of service and satisfaction. Always remember that post caps are a crucial part of a well-installed chain link fence‚ offering both protection and style. With the right selection and installation‚ they will enhance the overall quality of your fence‚ ensuring it remains a beautiful and functional feature of your property. By taking the time to add post caps‚ you complete your installation with a professional touch‚ providing lasting benefits for both the appearance and durability of your fence. This final step is essential for achieving a high-quality finish that reflects your investment in your property. Always prioritize the installation of post caps to protect your posts and enhance the overall look of your chain link fence. With so many options available‚ you can easily find post caps that match your style and needs‚ ensuring your fence stands out as a well-crafted feature of your property. Adding post caps is a simple yet important step that brings your installation to a polished conclusion‚ providing lasting benefits for your fence’s appearance and durability. By incorporating post caps into your project‚ you ensure your chain link fence remains a attractive and secure feature of your property for years to come. This small detail makes a big difference in the overall quality and longevity of your fence‚ making it a worthwhile addition to your installation. Always consider post caps as a necessary component of your fence‚ as they offer both practical protection and aesthetic enhancement. With the right choice and proper installation‚ post caps will elevate your fence’s appearance while safeguarding it against the elements. This final touch is essential for achieving a professional and lasting result‚ ensuring your chain link fence remains a beautiful and functional part of your property. By adding post caps‚ you complete your installation with a detail that enhances both the durability and visual appeal of your fence‚ making it
7.4. Optional Decorative Elements
Enhance your chain link fence with decorative elements for added style and curb appeal. Consider adding privacy slats or colored coatings to personalize the look. Post caps in various designs can add a polished finish. Decorative trim or panels‚ such as lattice work‚ can introduce visual interest. Installing lights along the fence creates a charming ambiance‚ while plants or vines can soften the appearance. Ensure any additions comply with local regulations and balance aesthetics with practicality for a beautiful‚ functional fence.
Safety and Maintenance
Regularly inspect the fence for damage or sagging‚ clean dirt and debris‚ and check hardware for tightness. Address rust spots promptly to prevent deterioration. Ensure safety by securing loose wires and keeping children away from sharp edges. Maintain the fence’s structural integrity to uphold its functionality and appearance over time.
8.1. Regular Inspections
Regular inspections are crucial to maintain the integrity of your chain link fence. Check for loose wires‚ sagging sections‚ and damaged posts. Look for signs of rust or corrosion on metal components‚ especially after harsh weather conditions. Inspect the fence fabric for tears or holes that may compromise security. Ensure all hardware‚ such as hinges and latches‚ is secure and functioning properly. Addressing issues early prevents minor problems from becoming major repairs.
8.2. Cleaning the Fence
Cleaning your chain link fence regularly helps maintain its appearance and durability. Start by removing loose debris like leaves or dirt using a broom or brush. For tougher stains or grime‚ mix a mild detergent with water and apply it to the fence using a soft-bristle brush. Rinse thoroughly with a garden hose to avoid soap residue. Avoid using harsh chemicals or abrasive cleaners‚ as they can damage the metal. Regular cleaning prevents rust and keeps the fence looking its best year-round.
8.3. Checking Hardware
Regularly inspect all hardware components‚ such as bolts‚ screws‚ and hinges‚ to ensure they remain secure and functional. Tighten any loose connections using a wrench or screwdriver. Check for signs of rust or corrosion on metal parts and address them promptly by applying a rust-inhibiting coating. Lubricate moving parts like gate hinges to maintain smooth operation. Replace any damaged or worn-out hardware immediately to prevent further issues and ensure the fence remains stable and secure over time.
8.4. Touching Up Rust Spots
Inspect the fence regularly for rust spots‚ as they can weaken the structure over time. Use sandpaper or a wire brush to clean and smooth the affected areas. Apply a rust-inhibiting primer to prevent further corrosion. Once dry‚ coat the treated spots with a durable outdoor paint that matches the fence’s original color. Addressing rust promptly ensures the fence remains structurally sound and maintains its appearance. Regular maintenance helps prevent rust from spreading and extends the fence’s lifespan significantly.
Common Mistakes to Avoid
Avoiding common errors ensures a successful installation. These include incorrect post depth‚ insufficient wire tension‚ improper hardware usage‚ and ignoring local regulations‚ all of which can compromise the fence’s integrity and longevity.
9.1. Incorrect Post Depth
One of the most common mistakes is setting posts at an incorrect depth. Posts that are too shallow may not provide sufficient stability‚ leading to leaning or collapse. Posts sunk too deep waste materials and effort without adding value. Ensure posts are installed to the recommended depth for your soil type and local building codes. Proper depth ensures fence stability and prevents future repairs. Always double-check measurements and use a post hole digger for accuracy. Concrete footings should be poured correctly to secure posts firmly in place. This step is critical for the fence’s structural integrity and longevity.
9.2. Insufficient Wire Tension
Insufficient wire tension is a common mistake that compromises the fence’s stability and appearance. Sagging wire can lead to damage from wind‚ animals‚ or heavy use. Proper tightening ensures the chain link fabric remains taut‚ preventing sagging and wear. Always use a tension bar or wire tightener to achieve the recommended tension level. Slack wire not only looks unprofessional but also reduces the fence’s durability and security. Regular checks and adjustments are essential to maintain proper tension over time.
9.3. Improper Hardware Usage
Using incorrect or low-quality hardware can weaken the fence’s structure and lead to premature damage. Ensure all components‚ such as bolts‚ screws‚ and wire ties‚ are specifically designed for chain link fences. Avoid substituting with inappropriate materials‚ as this can compromise stability and safety. Always follow the manufacturer’s recommendations for hardware to maintain the fence’s integrity and longevity. Proper hardware ensures the fence withstands environmental stress and daily wear effectively. Incorrect usage can result in costly repairs or even complete replacement.
9.4. Ignoring Local Regulations
Ignoring local building codes‚ zoning laws‚ or homeowners’ association rules can lead to legal issues‚ fines‚ or even removal of the fence. Always verify regulations regarding fence height‚ material‚ and setback requirements before installation. Compliance ensures the fence meets community standards and avoids costly corrections. Proper permits and approvals are essential to avoid legal complications. Failure to adhere to local regulations can result in project delays or financial penalties‚ making it crucial to check requirements beforehand.
Additional Resources
Chain link fence installation requires careful planning and execution to ensure durability and functionality. By following the steps outlined in this guide‚ you can achieve a professional-looking fence that enhances your property’s security and appeal. Remember to maintain your fence regularly and address any issues promptly to extend its lifespan. With proper preparation and attention to detail‚ your chain link fence will serve its purpose effectively for years to come.