Thread guides are critical components on sewing machines, directing the thread from the spool to the needle. They ensure proper thread tension and smooth stitching, preventing tangles and loops. These small but essential parts are vital for seamless sewing operations and consistent results.
1;1 What Are Thread Guides?
Thread guides are essential components on sewing machines designed to direct the thread from the spool to the needle. They are small, often unobtrusive parts that ensure the thread follows a specific path, maintaining proper tension and alignment. These guides can vary in design, from simple loops or hooks to more complex mechanisms, depending on the machine model. Their primary function is to prevent tangling and ensure smooth thread flow, which is critical for consistent stitching and fabric handling. By controlling the thread’s movement, they help maintain even tension, reducing the risk of loops, nests, or uneven stitching. While they may seem insignificant, thread guides play a vital role in the overall sewing process, ensuring that the thread behaves predictably as it passes through the machine. Understanding their purpose and placement is key to mastering machine threading and achieving professional results.
1.2 Why Are Thread Guides Important?
Thread guides are indispensable for ensuring smooth and efficient sewing operations. Their primary role is to direct the thread from the spool to the needle, maintaining proper tension and alignment. Without thread guides, the thread could tangle, loop, or lose tension, leading to uneven stitches, broken threads, or even machine damage. They prevent these issues by keeping the thread on a precise path, ensuring consistent stitching and professional results. Additionally, thread guides reduce frustration for sewists, especially beginners, by simplifying the threading process. Properly functioning guides also extend the machine’s lifespan by reducing wear and tear from misaligned or tangled threads. In essence, thread guides are the backbone of seamless sewing, ensuring every stitch is precise and every project turns out as intended.
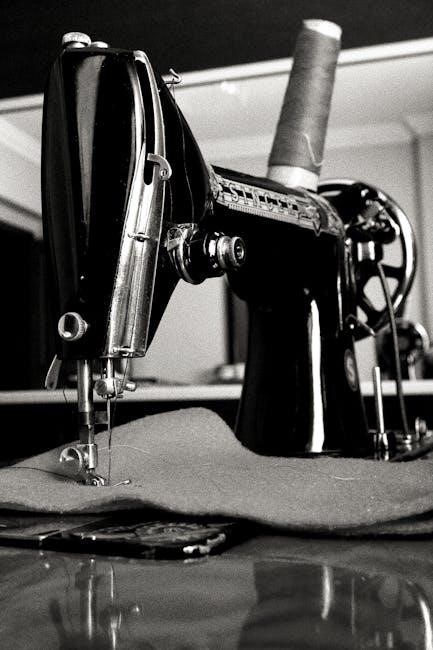
Identifying Thread Guides on Your Sewing Machine
Thread guides are small metal loops or hooks that direct the thread from the spool to the needle. Their location and appearance vary by machine type and model.
2.1 Location and Types of Thread Guides
Thread guides are typically located near the spool pin, tension discs, and along the machine’s arm. They come in various forms, such as small metal loops or hooks, and may be fixed or adjustable. Some machines feature multiple guides to direct the thread smoothly from the spool to the needle. While they are essential for maintaining proper thread tension, their exact placement can vary depending on the machine’s design. Many guides are not clearly marked, making it important to consult your sewing machine’s manual for precise locations. Understanding the types and positions of these guides helps ensure accurate threading and prevents common issues like tangled threads or uneven stitching. Proper alignment through these guides is crucial for achieving consistent and high-quality sewing results.
2.2 How Thread Guides Vary by Machine Type
Thread guides on sewing machines can differ significantly depending on the machine’s type and functionality. Mechanical machines often have straightforward, fixed guides, while computerized models may feature adjustable or automated systems. Overlock and serger machines, designed for specialized stitching, include additional loopers that act as thread guides to manage multiple threads simultaneously. Heavy-duty or industrial machines typically have more robust guides to handle thicker threads and faster operation. The number and complexity of guides also vary, with some machines offering single-thread paths and others requiring multi-thread guidance. Understanding these variations is essential for proper threading, as incorrect use can lead to poor stitch quality or machine malfunction. Always refer to your machine’s manual to identify and use the guides correctly, ensuring smooth operation and professional-grade results.
Step-by-Step Guide to Threading Your Sewing Machine
Threading a sewing machine involves placing the thread on the spool pin, winding the bobbin, and guiding the thread through the machine’s designated path to the needle, ensuring proper tension for smooth stitching.
3.1 Preparing the Thread and Machine
Before threading, ensure your sewing machine is turned off and the presser foot is raised. Place the thread on the spool pin, ensuring it unwinds smoothly. Wind the bobbin by guiding the thread through the machine’s bobbin winder, maintaining consistent tension. Once the bobbin is full, trim the excess thread. If using a pre-wound bobbin, insert it into the bobbin holder, making sure the thread unwinds in the correct direction (usually anti-clockwise). Adjust the thread tension according to your machine’s guidelines. Always use high-quality thread suitable for your fabric type. Consult your machine’s manual for specific instructions, as different models may vary slightly. Proper preparation ensures a smooth threading process and even stitching.
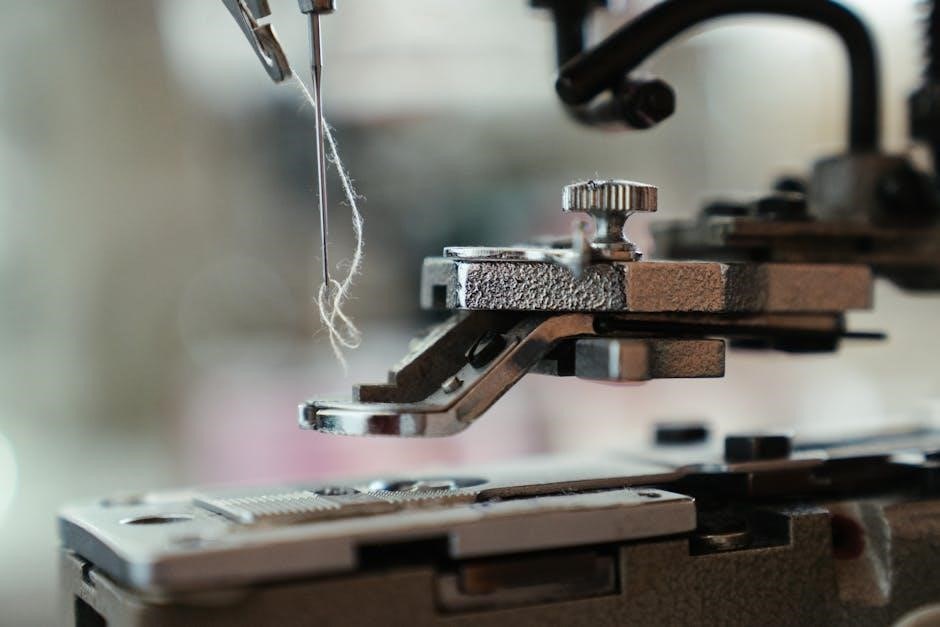
3.2 Threading Through the Guides
Start by placing the thread on the spool pin and gently pull it to ensure it unwinds smoothly. Guide the thread through the first thread guide, typically located near the top of the machine. Follow the machine’s numbered or marked path to direct the thread through each subsequent guide. Pass the thread through the tension discs, ensuring it clicks into place for proper tension control. Next, loop the thread around the take-up lever, moving from front to back, and then guide it down toward the needle. Keep the thread taut but not overly tight to avoid kinking or twisting. Finally, insert the thread through the needle’s eye, ensuring it is seated correctly. Avoid pulling too hard, as this could cause misalignment or damage to the needle. Proper threading through the guides ensures smooth operation and consistent stitching quality.
3.3 Securing the Thread
After threading through the guides, gently pull the thread to remove any slack. Trim the excess thread close to the needle to prevent it from unraveling. Ensure the thread is seated properly in the tension discs and take-up lever. Lightly tug on the thread to confirm it is secure and evenly tensioned. If the thread feels too loose or tight, adjust the tension discs accordingly. Finally, test the thread by sewing a few stitches on a scrap piece of fabric to ensure smooth, even stitching. Properly securing the thread is essential for maintaining consistent tension and preventing issues like thread breakage or uneven stitches during sewing.
Common Issues and Troubleshooting
Common issues include thread tangling, uneven tension, or loops. Check thread guides for proper alignment, ensure the thread isn’t wrapped around the needle, and adjust tension settings as needed.
4.1 Symptoms of Incorrect Threading
Incorrect threading can lead to various issues, including tangled threads, uneven tension, and visible loops on the fabric’s underside; The machine may also produce poor stitch quality, with the thread failing to create a smooth, consistent seam. In some cases, the thread might wrap around the needle or other parts, causing jams or breaks. If the thread guides are not properly aligned or the thread isn’t seated correctly, it can result in skipped stitches or a complete lack of stitching. These symptoms often indicate that the thread wasn’t guided through the machine’s tension discs or take-up lever properly. Identifying these issues early can prevent further damage and ensure your sewing projects turn out as intended.
4.2 Solutions for Thread-Related Problems
Most thread-related issues can be resolved by rethreading the machine or adjusting the tension settings. Start by turning the handwheel to lower the needle and gently pull the thread to remove any loops or tangles. Ensure the thread is properly seated in the tension discs and take-up lever. If the thread is too tight or too loose, adjust the tension dial accordingly. For persistent problems, clean the thread guides and tension discs to remove lint or debris. Using high-quality thread suitable for your fabric type can also prevent issues. If the thread continues to loop or break, check the needle for damage and ensure it is correctly inserted. Regularly maintaining your machine and following the manufacturer’s threading guide can help avoid these common problems and ensure smooth sewing operations.

Maintenance and Care of Thread Guides
Regularly clean thread guides with a soft brush or compressed air to remove lint and debris. Adjust tension settings carefully to avoid damage. Proper maintenance ensures smooth thread flow and consistent stitching quality.
5.1 Cleaning the Thread Guides
Cleaning the thread guides is essential for maintaining your sewing machine’s performance. Over time, lint, debris, and thread fragments accumulate, which can cause threading issues and uneven tension. To clean, turn off and unplug your machine for safety. Use a soft-bristled brush or compressed air to gently remove lint and debris from the guides. Avoid using harsh chemicals or abrasive materials that might damage the components. For stubborn buildup, dampen a cotton swab with water or sewing machine oil and carefully wipe away residue. Regular cleaning ensures smooth thread flow and prevents tangles or breaks. It’s also a good idea to clean after every project to prevent fabric fibers from accumulating. By keeping your thread guides clean, you extend the life of your machine and ensure consistent stitching quality. This simple maintenance step is crucial for optimal sewing performance.
5.2 Adjusting Thread Tension
Adjusting thread tension is vital to ensure proper thread flow and prevent issues like loose stitches or fabric dragging. The tension regulator, often located near the thread guides, controls the thread’s tightness. To adjust, gently turn the tension dial or knob while observing the thread’s movement. Proper tension should allow the thread to flow smoothly without sagging or pulling too tightly. Always test the tension on a scrap piece of fabric before starting your project. If the thread is too tight, it may cause fabric puckering or breakage. If too loose, stitches may be uneven or looped. Refer to your machine’s manual for specific instructions, as mechanisms vary by model. Keeping the tension balanced ensures consistent stitching and prevents damage to the thread guides or machine. Regular adjustments help maintain optimal sewing performance and extend the machine’s lifespan.

The Role of Thread Guides in Sewing
Thread guides play a crucial role in sewing by directing the thread smoothly from the spool to the needle, ensuring even tension and preventing tangles. Their precise alignment guarantees consistent stitching and high-quality results in every project.
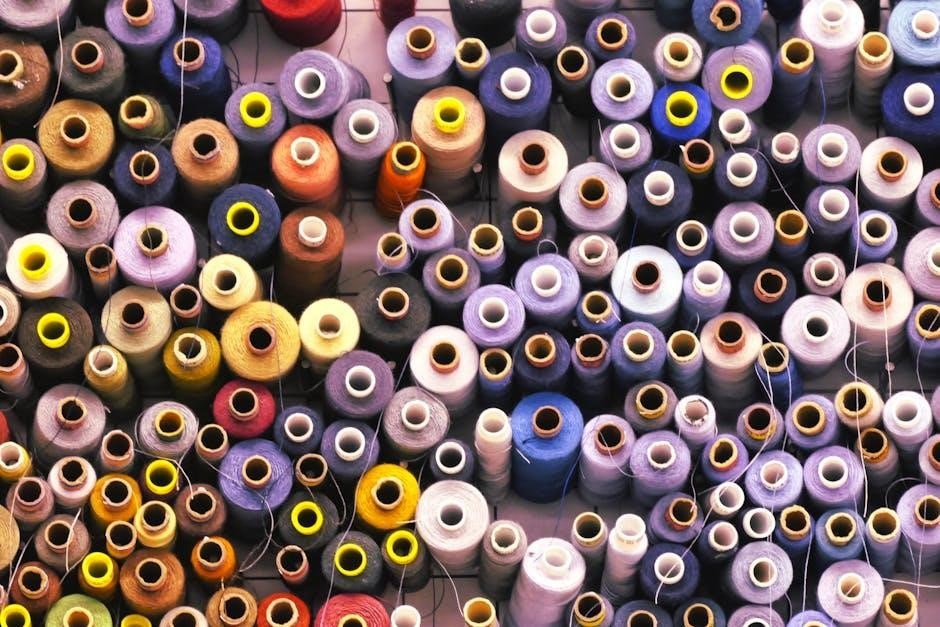
6.1 Choosing the Right Thread
Choosing the right thread is essential for achieving professional-looking stitches and ensuring durability in your sewing projects. The type of thread you select depends on the fabric you’re working with, as well as the specific requirements of your project. For example, cotton threads are ideal for natural fabrics like cotton and linen, while polyester threads are better suited for synthetic or stretchy materials. Blends of cotton and polyester offer a balance of strength and flexibility. Specialized threads, such as metallic or elastic threads, are designed for specific tasks like decorative stitching or sewing stretchy fabrics. Always consider the weight and fiber content of the thread to ensure compatibility with your fabric. Matching the thread color to your fabric will create a seamless finish. By selecting the appropriate thread, you can enhance the quality and longevity of your sewing projects.
6.2 Significance in the Sewing Process
Thread guides play a pivotal role in the sewing process by ensuring the thread moves smoothly from the spool to the needle. Their precise alignment and placement are crucial for maintaining consistent stitch quality and preventing issues like loops or puckering. Properly threaded guides help regulate thread tension, which is essential for even fabric handling and machine performance. Without functional thread guides, the thread may tangle, twist, or break, leading to uneven stitches and project delays. Additionally, thread guides are integral to the machine’s mechanical operations, as they direct the thread through the needle and bobbin system. Their significance lies in their ability to streamline the sewing process, ensuring accuracy and efficiency. By guiding the thread accurately, they enable sewists to achieve professional-looking results and maintain the longevity of their sewing machine.